Manage members and permissions
Our software allows you to add members to your team and manage their permissions. Here's how you can do it:
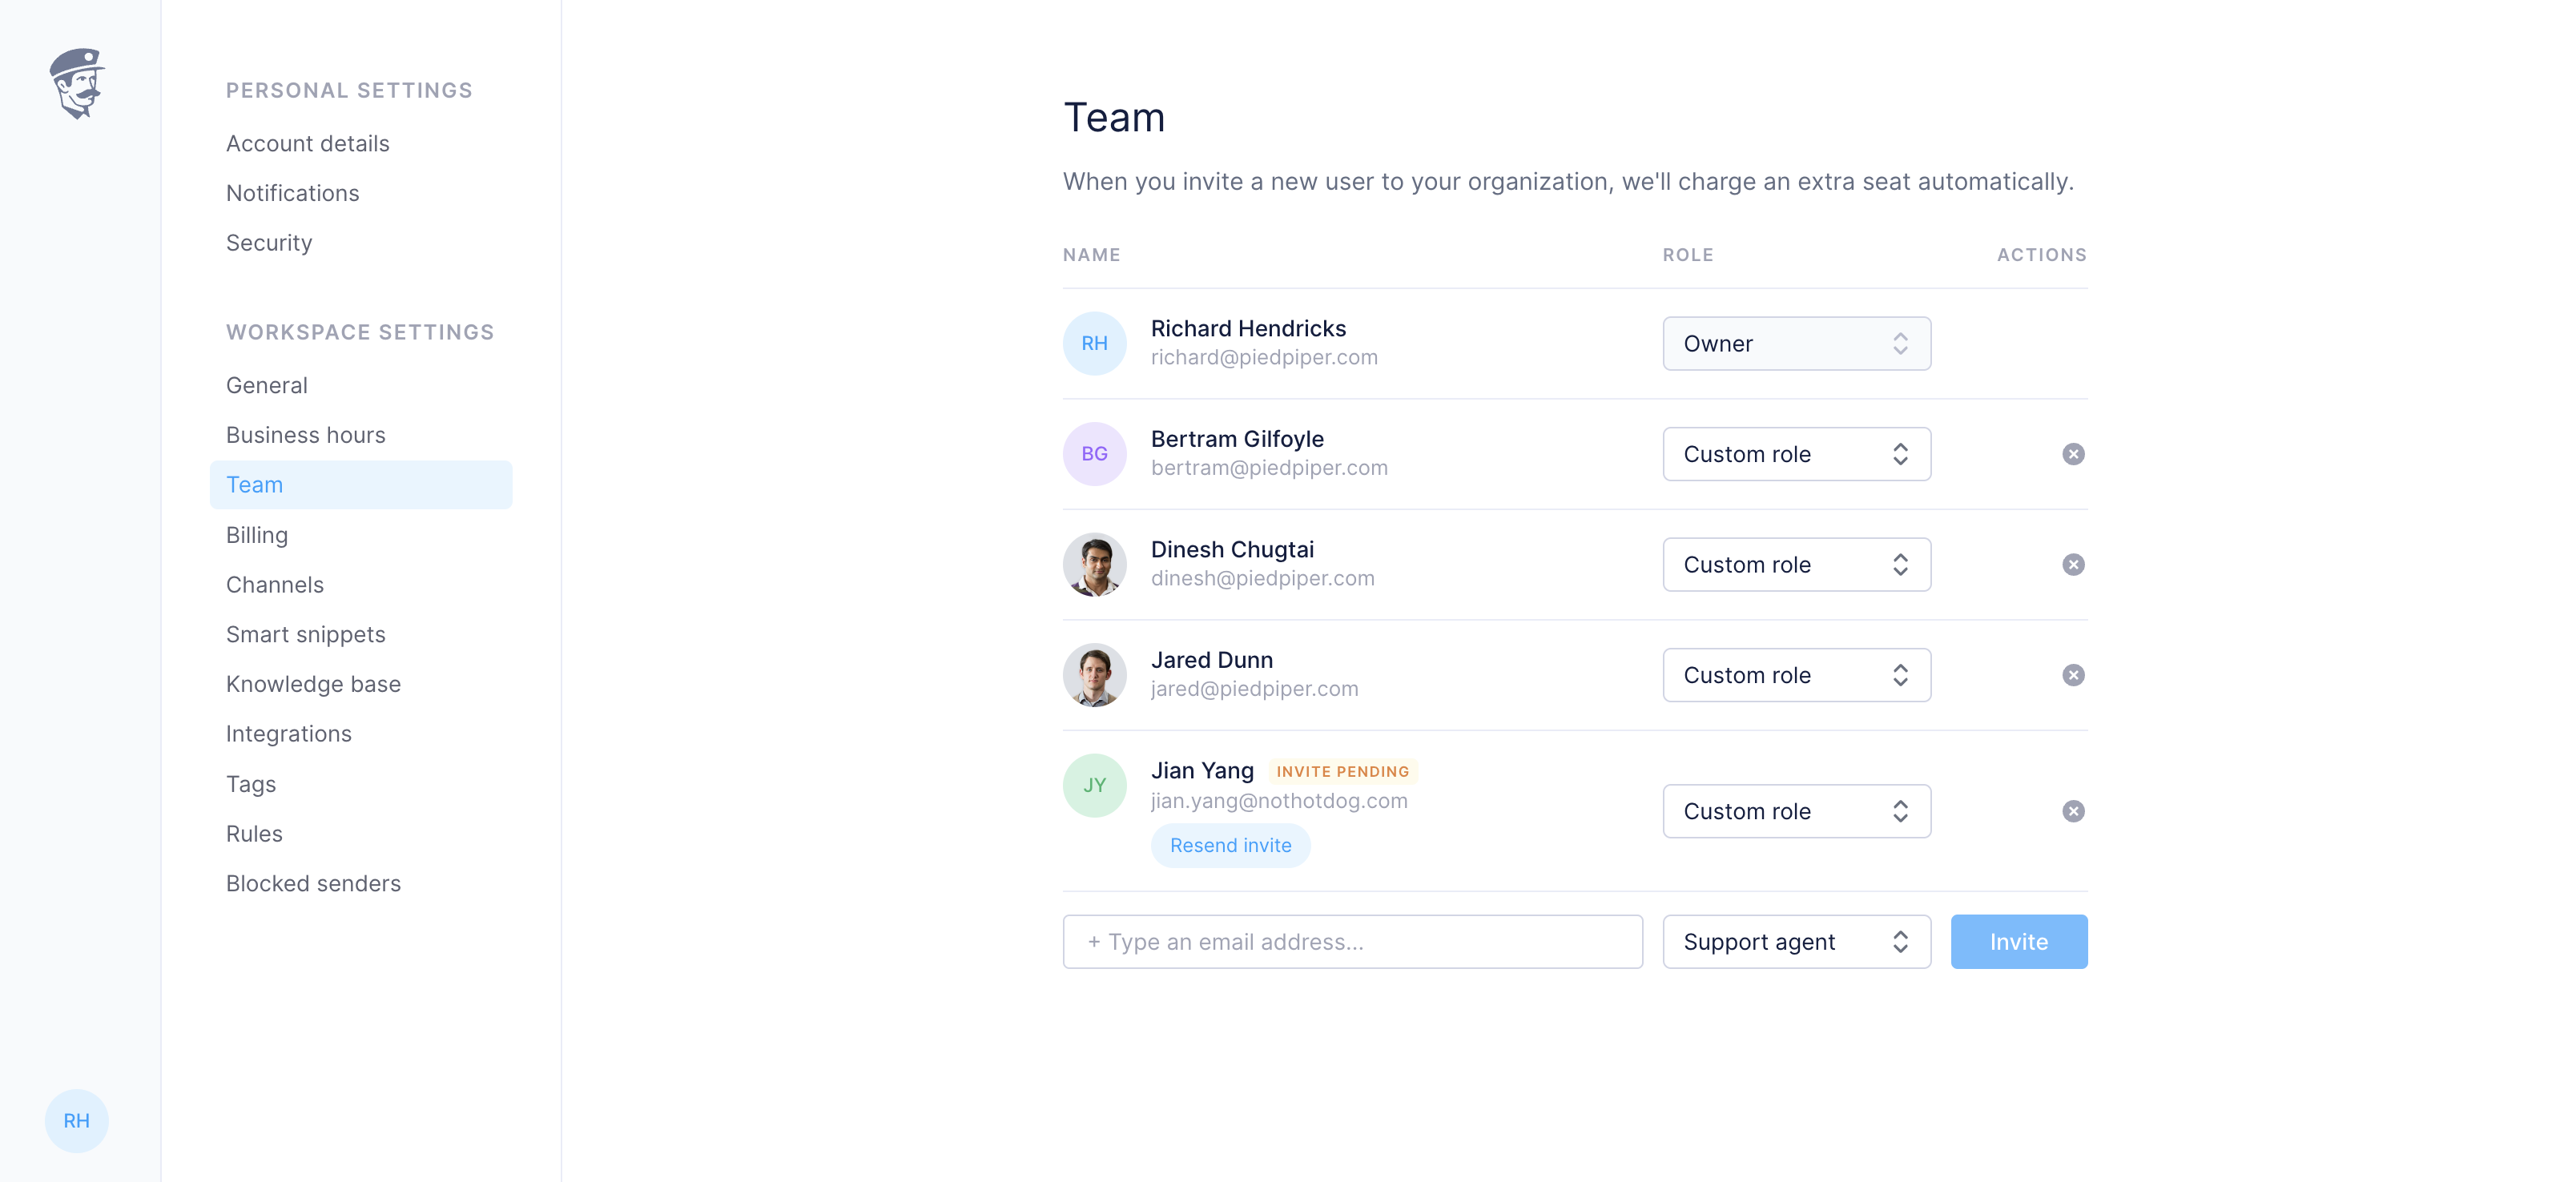
Adding members
To add a new member to your team, go to the 'Team' section in your account settings. Click on 'Add Member', enter their email address, and send them an invitation to join your team. They will receive an email with instructions on how to join.
Setting permissions
Once a member has been added, you can set their permissions. Permissions determine what a member can and cannot do within the software. For example, you can set whether a member can view, edit, or delete certain data.
Types of permissions
We offer several types of permissions to suit different roles within a team. These include:
Admin: Can manage all aspects of the team and its data.
Editor: Can view and edit data, but cannot delete it.
Viewer: Can only view data.
Changing permissions
You can change a member's permissions at any time. To do this, go to the 'Team' section in your account settings, find the member whose permissions you want to change, and select the new permissions from the dropdown menu.
Removing members
If a member leaves your team, you can remove them from your account. To do this, go to the 'Team' section in your account settings, find the member you want to remove, and click 'Remove'.
Need help?
If you need help managing members and permissions, don't hesitate to reach out to our support team. We're here to help!