Setting up business hours
Helping customers understand when they can expect to hear from you is crucial to providing a good user experience. Business hours also enable efficient automation of rules linked to these hours. Without defined business hours, we default to considering your business as open 24/7. In this guide, we'll walk you through how to specify your business hours.
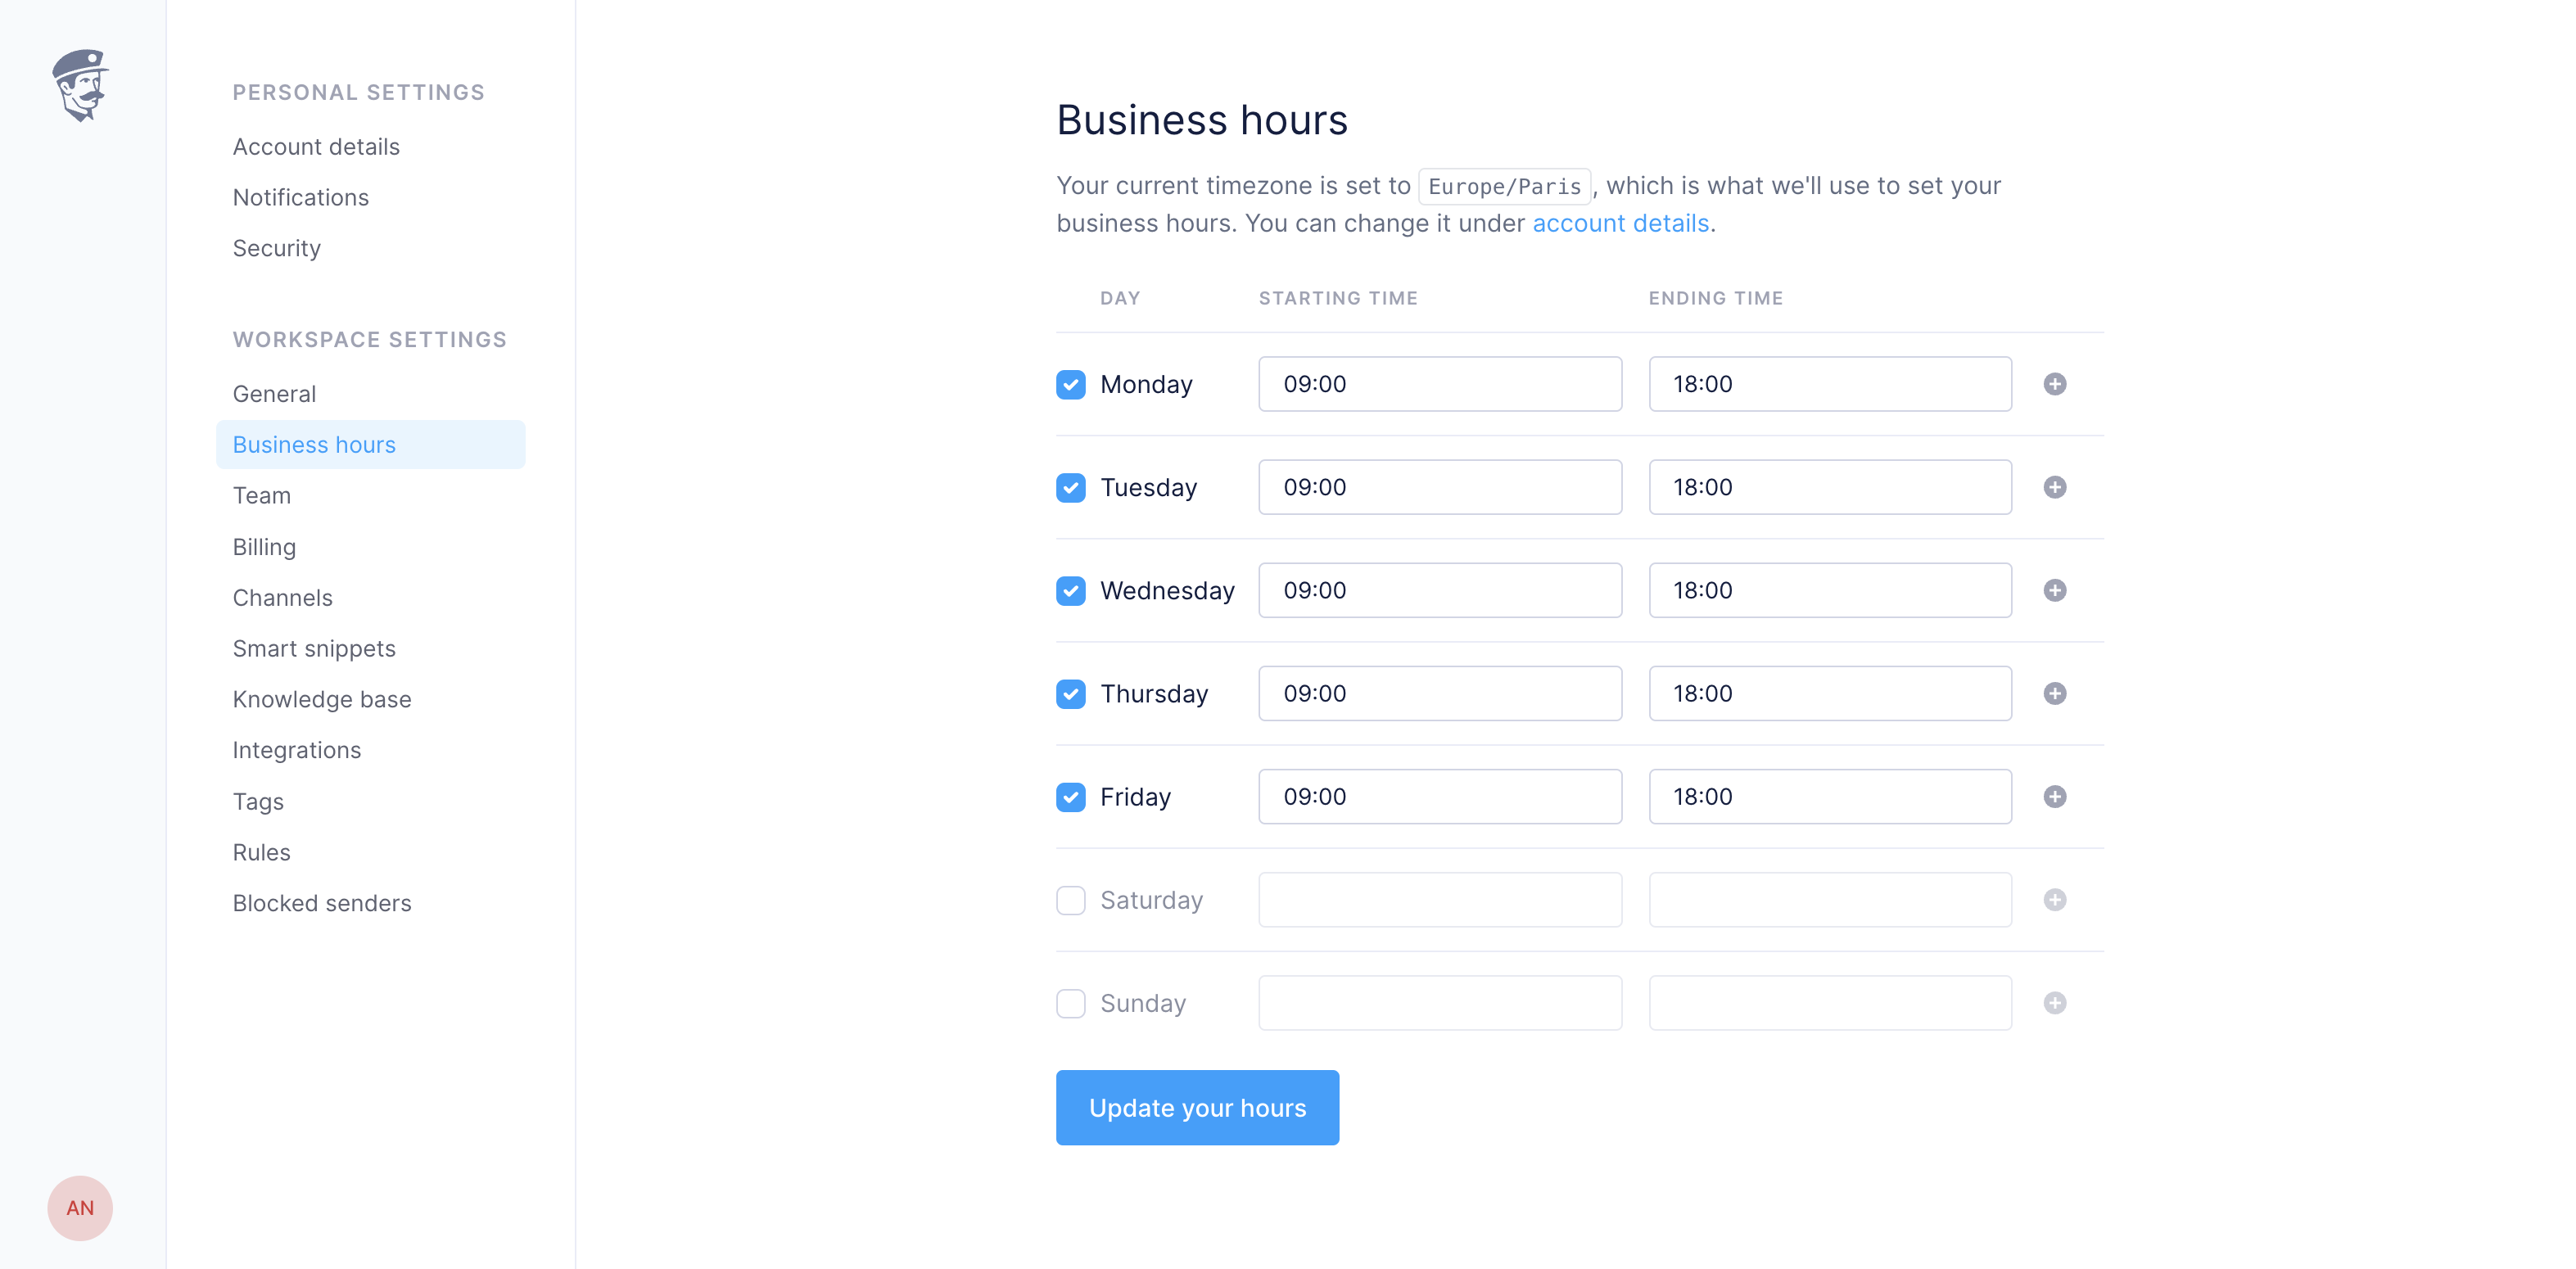
How to set your business hours
Navigate to "Settings" in your dashboard.
Click on "Business Hours".
For each day you're open, click "Add" next to the day and set a "Starting time" and "Ending time".
Click "Save" after setting your hours for each day.
How to delete business hours
If your business isn't open on a specific day or time, you can also delete those hours.
Go to "Settings" in your dashboard.
Click on "Business Hours".
Find the day and time period you want to delete.
Click the "Delete" icon on the right, next to the time period.
Click "Save" to finalize your changes.
Setting your business hours helps manage customer expectations and allows for more effective automation, especially used in conjunction with our smart routing automation feature.
Remember, you can always adjust these settings as your business grows or changes. Enjoy making the most of this organizational feature!