Setting up a Split Inbox
Splits are customizable sections of your inbox that allow you to organize conversations based on specific criteria. Think of them as smart folders that automatically sort your incoming messages, helping you prioritize and focus on what matters most.
Your inbox, your way
Split inboxes are customized on a per-user basis, not organization-wide. This means you have the flexibility to create and manage split inboxes that cater to your individual workflow and preferences, which may differ from those of your teammates.
For instance, you might set up a split inbox for high-priority clients you personally manage, while your teammate could have a split for technical support inquiries they specialize in.
Increased efficiency
Process similar requests together, reducing mental load and context switching.Better prioritization
Create splits for urgent issues, VIP customers, or specific product lines.Team coordination
Assign splits to different team members based on expertise, language knowledge, or workload.
Managing splits
Hit ⌘+K or CTRL+K to open our command palette, and select Configure split inboxes. Alternatively, you can click on the … icon on the top right of the inbox page.
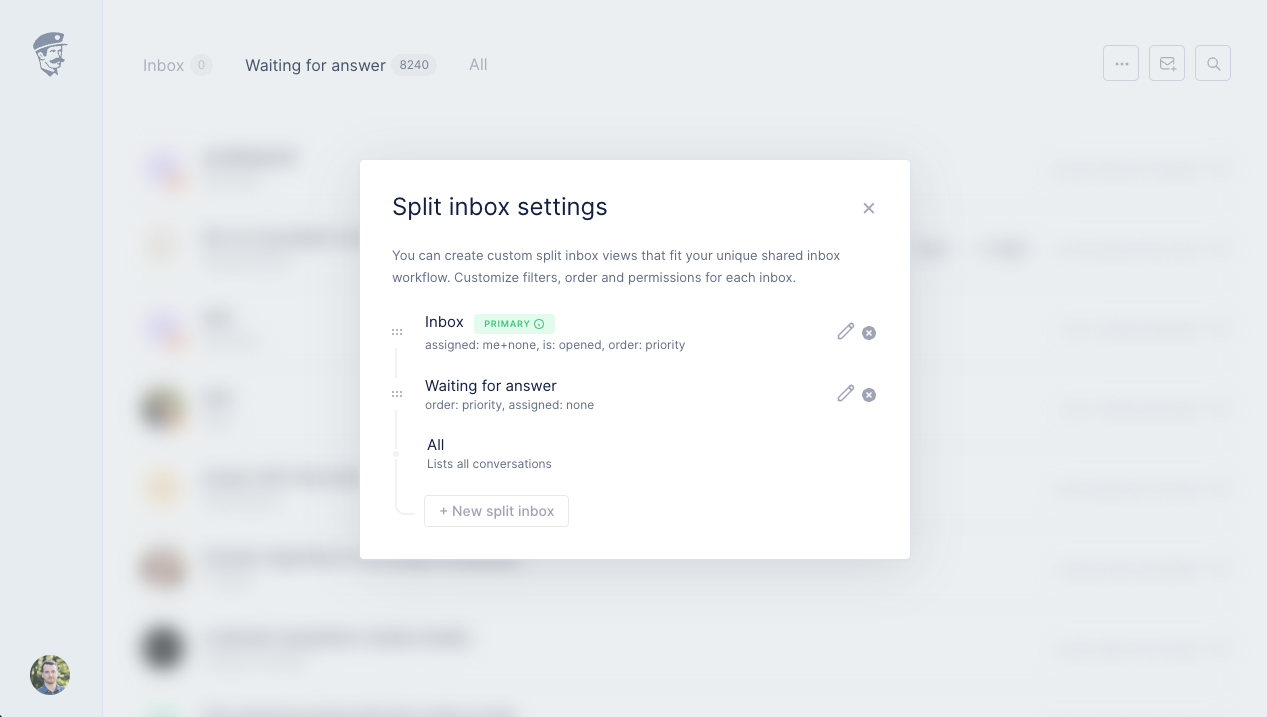
You will have access to three inboxes: Inbox, Waiting for Answer, and All Conversations. This is the opinionated default we chose to help you increase focus and fly through your support inbox.
You can re-order split inboxes by using the drag handle on the left.
Primary inbox
The first inbox will always be considered your "Primary inbox". Think of it as your personal conversation to-do list. Your goal is to empty it by the end of each session. Here's how you can process each conversation:
Respond and Resolve
Address the inquiry comprehensively and mark as done.Delegate
Assign to the best-suited team member.Defer
Snooze for later if more information is needed or it's not time-sensitive.
As you clear it, you'll be getting closer to a satisfying inbox-zero experience. It's your path to a calm, productive workday.
Creating a split inbox
Split inboxes are managed through filters, meaning we'll list conversations that match the filters you set. To get started, click on + New split inbox — this will open a new modal prompting you to set your matching filters.
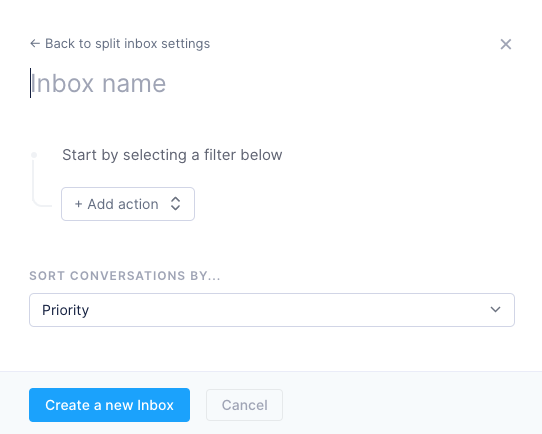
From this, set a name for your inbox (e.g., "Urgent Issues", "VIP Customers", or "Product Feedback") and click on + Add action to select a filter. For now, we support the following filters:
Status is
Open
Done
Snoozed
Marked as spam
Assigned to
Assigned to me
Assigned to me or no one
Unassigned
Assigned to {{agent}}
Contact email is ...
Specific email
Domain catch all
Channel is ...
Specific channel (e.g. sales@domain.com)
Subject contains ...
Keyword
Message contains ...
Keyword
Message source is ...
Email
Chat
Message language is ...
Contact is a customer
Tagged with
Splits are more than just an organizational tool - they're a strategic asset in delivering exceptional customer support. By thoughtfully implementing splits, you'll create a more responsive, efficient, and satisfying experience for both your team and your customers.